Sunday, November 28, 2010

First pre-release of Integrated Parametric RepRap

I just uploaded the first pre-release of my Integrated Parametric RepRap OpenSCAD files.  Currently it does not make anything printable but what it does do is "build" a parametric frame based on the settings in the DNA file.

The core files contain the following:
IPR_DNA:
All constants and calculations, the constants define all the possible things that make a specific robot unique. (ranging from desired build space to fastener and bearing sizes)
IPR_func:
All "standard" modules, such as motor mounts, bearing mounts, hardware models, etc... currently this file "builds" the main frame out of the hardware specified in the IPR_DNA file.


The following pictures show the frame with a 100x100, 150x150, & 200x200 build space with normal Mendel sized hardware (including a NEMA17 Z motor on the left).
100x100
150x150
200x200
This picture shows a 300x300 build space with larger hardware (608 guide bearings and 12mm rod).
300x300
This should give you an idea of the flexibility I am building into this design.


I plan to keep ALL constants and calculated values in the DNA file and everything else in a few files that call the DNA and func files.

Here are my current rules:
  1. If it is a constant it lives in the DNA file.
  2. If it is a calculation that effects parts (not positional calculations but dimensional ones) it lives in the DNA file.
  3. If it is a module that anything else needs to call it lives in the func file.
The goal is to eliminate redundancy and simplify the whole process of generating a robots files.


For more information visit the main documentation at:
reprap.org/wiki/Integrated_Parametric_RepRap
Wednesday, November 24, 2010

More Hollow Prints

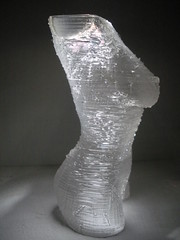
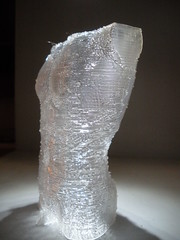
After last week I am, at least temporarily, hooked on hollow prints.  So I downloaded MakeHuman and did some experiments with making my own human forms.  I then printed a male and a female.

MakeHuman female test 2 MakeHuman male test 2

After examining them I determined it would work better if I printed them upside-down.  So I re-trimmed the files and printed them again with very nice results (the above pictures are of the upside-down prints).  I have uploaded these to Thingiverse (male and female) and hope others are inspired to create more human forms to print.

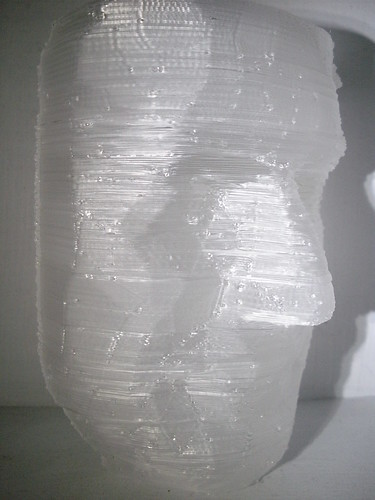
I also printed a large hollow version of a 3D scan of my face.

My face scanned and printed

Be sure to check out more pictures on Flicker.

Saturday, November 20, 2010

My Attempt at a Hollow Woman Print

After seeing a picture from Erik de Bruijn of the pink panther woman printed on an UltiMaker with no infill I thought I would try that and see how it turned out.  Here it is:
 
Mine is not as smooth as Erik's as it has pause points that leave little blobs... It is still a very cool print.

Sunday, November 14, 2010

3rd Mendel Set for Sale & More About Moustaches

Willow has recently completed it's third complete set of Mendel parts! This set was printed using mostly Blue Translucent, UV Happy, UltiMachine PLA.  I did run out of that PLA before finishing the extruder and a few of the y bar clamps, so the those are printed in the Natural PLA.


They are on eBay currently and close on Nov 18, 2010 at 5:56:54 PST.  I have cleaned them up some but have not reamed the holes.  They come with a certificate of lineage (for anyone tracking that) suitable for framing.  Check out the eBay listing for more information.

I also have a collection of items on etsy that I am selling to help support Movember.  During the month of November I am donating 100% of the sale price of all of these items to the Movember Foundation.  Some of these items were 3D printed on Willow.  If you want to see my slow growing moustache updates or donate money directly to Movember you should visit my MoSpace Page.

Sunday, November 7, 2010

Movember Moustaches

I took a small detour from Mendel reproduction to explore printing Moustaches (I am participating in Movember).  I first made a design that works very well for a larger Moustache but started to behave strangely in RepSnapper as I scaled it down.  The slices would start getting too small and the part would have huge steps.


So I tweaked my design and made a second version that worked a little better (more rounded points and slightly better geometry).  RepSnapper still had problems with strange layers with this version.

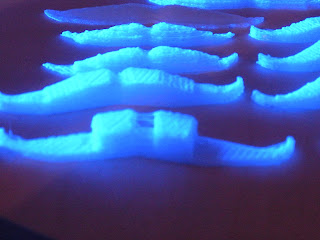
I ultimately made a third version with simpler geometry.  This version worked very well for small Mo's (2nd-3rd image below) but RepSnapper did something even stranger on the versions with holes for a necklace cord or key chain (top two).
The geometry is just chopped at the hole.
I took the STLs into MeshLab and did some smoothing and face re-simplification and was able to get something that did not have sharp corners and prints well in RepSnapper (even with the holes - see bottom two images above).  It is probably time to start learning how to use something more robust than RepSnapper (like Skienforge...)